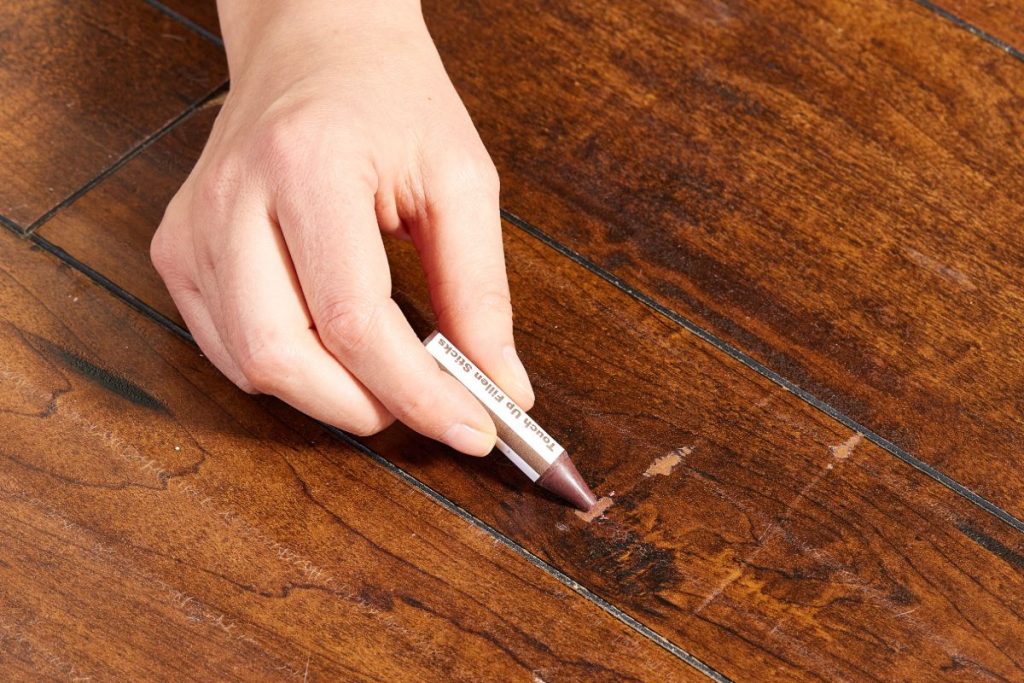
Hardwood floors bring elegance and character to any home, but they’re not immune to wear. Over time, everyday use can leave behind scratches—from pets’ nails to dragged furniture or even grit on shoes. The good news? You don’t always need a professional or a full refinish. In many cases, you can buff out scratches on hardwood floors at home with the right technique and tools.
This step-by-step guide will help you restore the natural beauty of your timber floorboards and reduce the visibility of blemishes using effective, affordable methods.
Step 1: Identify the Type of Scratch
Start by examining the damage. You’ll get better results when you match the repair method to the scratch depth. Most scratches fall into one of these categories:
- Surface-level scratches – Only affect the protective finish.
- Deeper scratches – Cut into the wood grain itself.
- Gouges or dents – More severe, involving displaced or compressed wood.
Recognising whether it’s a light scuff or a deep gouge helps you choose the correct repair strategy.
Step 2: Clean the Area Thoroughly
Before starting any repair, clear away dust and debris that could interfere with results. Use a soft brush or vacuum with a floor attachment to remove particles.
Then wipe the area using a microfibre cloth and a pH-neutral wood floor cleaner. Avoid over-wetting the floor—especially if it’s not sealed. Always let the area dry fully before buffing or applying any product. If you’re unsure about cleaning technique, check this guide to cleaning old hardwood floors.
Step 3: Buff Light Scratches with a Pad or Steel Wool
For light scuffs and surface blemishes, a scratch repair pad or ultra-fine steel wool (0000 grade) works well. Gently rub along the wood grain to avoid swirl marks.
This buffing hardwood floors method helps smooth out the finish without damaging it. After buffing, apply a small amount of wood polish or finishing oil to enhance shine. Buff again with a dry cloth.
Step 4: Use a Wood Stain Marker on Deeper Scratches
If a scratch has reached into the timber but hasn’t gouged it, a wood stain marker is a quick fix. These pens are ideal for hardwood surface scratch removal, especially when matched to your floor colour.
Run the marker along the scratch following the grain. Wipe off excess immediately. To blend, gently buff with steel wool and reapply a light coat of wood polish or scratch remover product.
Step 5: Fix Medium Gouges with a Scratch Repair Kit
For shallow gouges or long visible scratches, a full scratch repair kit may be more effective. These kits often include:
- Wax filler stick (ideal for small gaps)
- Applicator or melting spatula
- Matching polish or sealant
Soften the wax slightly with the included tool, press into the scratch, and level the surface. Once set, polish and buff until the repair blends with surrounding boards. This works well when you need to remove scratches from wood floor sections that are too large for stain pens alone.
Step 6: Refinish Heavily Scratched Areas
When floors have multiple scratches, dull areas, or patchy stains, consider light refinishing. You don’t have to sand everything:
- Spot refinishing: Lightly sand the damaged section with fine-grit sandpaper. Restain and seal to match the finish.
- Screen and recoat: A professional may buff the top layer and reapply polyurethane for a refreshed finish.
Always test stain or sealer in an inconspicuous spot first. Reapplying without feathering edges can leave noticeable lines. If your floors have larger flaws like visible separations, try this gap-filling technique for hardwood floors.
Step 7: Prevent Future Scratches on Hardwood
Prevention is just as important as repair. A few smart habits can reduce the need for ongoing fixes:
- Use felt pads under chairs and tables
- Keep pets’ nails trimmed
- Lay down rugs or runners in high-traffic areas
- Vacuum and sweep regularly to remove grit
- Avoid high heels or heavy shoes indoors
These practices extend the life of your finish and reduce how often you’ll need to buff out scratches. You can also maintain your floor’s beauty using a homemade hardwood cleaner between repairs.
Tools & Materials You May Need
Here’s a quick checklist to prepare your DIY kit:
- Microfibre cloths
- pH-neutral wood cleaner
- Fine steel wool (0000)
- Scratch repair pads
- Wood stain marker
- Scratch repair kit (wax stick, spatula, polish)
- Fine-grit sandpaper
- Wood polish or oil-based sealer
Having the right supplies ensures each step is safe and effective.
Should You Call a Professional?
DIY methods are great for light to moderate damage. However, if you’re dealing with antique timber, extensive scratches, or floors with complex finishes, a specialist may be worth it.
Over-sanding or using the wrong filler can worsen the appearance or damage your boards. A flooring expert will assess whether your wood floor needs light polishing, sanding, or complete refinishing. And if scratches are caused by furniture movement, check if your pieces are positioned properly—this bar stool sizing guide can help reduce unnecessary contact.
Final Thoughts
Learning how to buff out scratches on hardwood floors can save you money and keep your home looking well-kept. Whether you’re tackling light hardwood floor scratches fix or addressing deep scratch hardwood solution needs, this guide has you covered.
To recap:
- Match your method to the scratch type
- Use gentle materials that follow the wood grain
- Choose repair products that match your finish
- Maintain regularly to avoid further damage
Much like skincare, floor care is about consistency. Regular upkeep with the right tools can make your hardwood floor last decades.
Quick FAQs: Scratch Repair on Hardwood Floors
Can I use olive oil to hide scratches temporarily?
Yes, olive oil can slightly darken and disguise surface scratches on darker wood tones. However, this is only a temporary cosmetic fix and doesn’t restore the protective finish. Avoid using it on lighter wood as it may stain unevenly.
Is sanding always necessary for deep scratches?
Not always. If the scratch hasn’t damaged a large area, using a wax filler or repair kit is usually enough. Sanding is recommended only when scratches are widespread or the finish has worn unevenly. Spot refinishing can be a good middle ground.
What’s the difference between oil-based and water-based wood polish?
Oil-based polishes penetrate deeper into the grain, offering a warmer tone and longer-lasting protection but may take longer to dry. Water-based polishes dry faster, are low in odour, and are ideal for lighter finishes. Choose based on your floor type and desired look.

