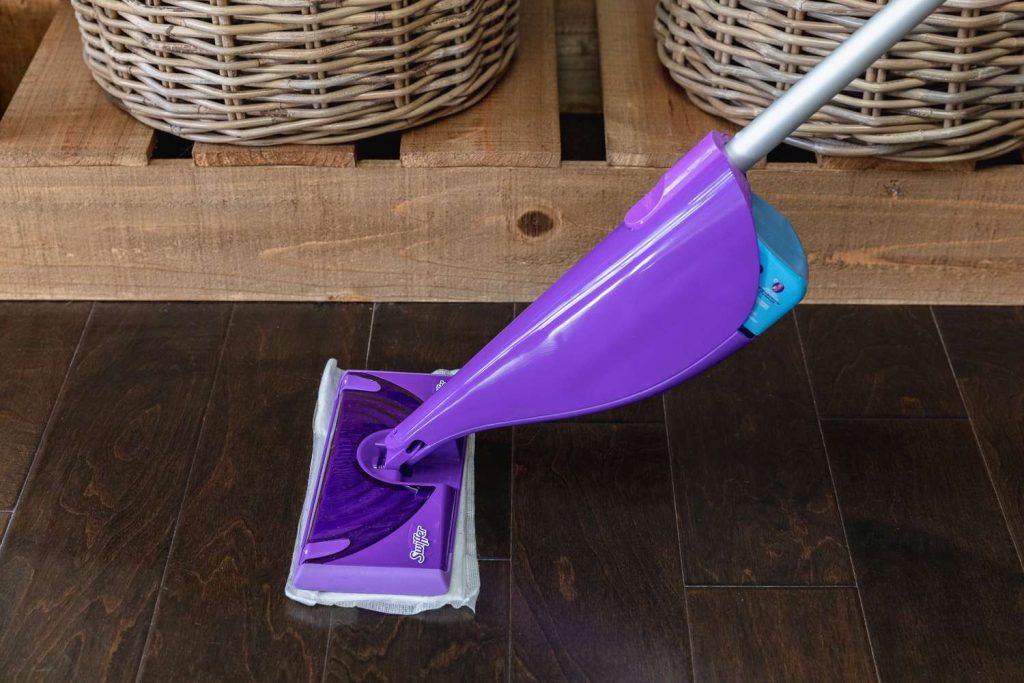
If you’ve just bought a Swiffer WetJet, you probably want to get it working fast without messing up your floors. The good news? Setup is simple, but the small details—like choosing the right pad or knowing when to swap it—make all the difference between a streak-free clean and a sticky mess. This guide breaks it down step by step so your very first clean feels effortless.
Quick Start
If you’re short on time, here’s the bare minimum to get your Swiffer WetJet ready:
- Snap the handle sections together until they click.
- Insert 4 AA batteries in the handle (check the plus/minus signs).
- Load the cleaning solution bottle into the back of the mop until it clicks.
- Press a pad onto the Velcro base—soft white side faces the floor.
- Prime the sprayer with 2–3 trigger pulls, then start cleaning in an easy S-pattern.
That’s it—your Swiffer WetJet is ready for action. If you want a deeper walkthrough, keep reading.
What You’ll Need
Before you start cleaning, make sure you’ve got everything ready. Having the right setup saves you from streaks and wasted pads. Here’s your short checklist:
- Swiffer WetJet mop – the base tool, already assembled.
- Cleaning solution – Multi-Surface for tile, vinyl, or laminate; Wood solution for sealed hardwood.
- Pads – choose standard, Wood, or Extra Power depending on your floor type.
- Spare pads and a small trash bag – you’ll likely need a mid-clean swap.
- Vacuum or broom – always clear dust and grit first to avoid scratching floors.
- (Optional) Microfiber cloth – a quick buff at the end helps if you want a matte finish.
With this list, you won’t be running back and forth mid-clean.
Assembly & Setup (Picture-Guided)
Setting up the Swiffer WetJet takes just a few minutes, and once it’s done, you won’t need to repeat most of these steps again. Follow this simple order:
1. Insert the Batteries
Open the compartment on the handle and slide in 4 AA batteries, making sure the plus and minus symbols line up correctly. Close the cover until it snaps shut.
2. Connect the Handle & Mop Head
Click the handle sections together one by one. Push firmly so there’s no wobble. Attach the handle to the mop base until you hear a solid click.
3. Load the Cleaning Solution
Take your chosen solution bottle (Multi-Surface or Wood). Hold it with the neck down and push it into the slot on the mop until it clicks into place. If it feels loose, remove and reinsert.
4. Attach the Pad
Lay the pad flat with the printed logo side facing the mop. Press the mop head down onto the pad so the soft white side touches the floor. Smooth the edges to make sure it’s stuck evenly.
5. Prime the Sprayer
Before your first clean, squeeze the trigger a few times until you see a fine mist spray out of the nozzles. This primes the pump and gets it ready to go.
Choose the Right Pad & Solution
Not every floor is the same, and that’s why Swiffer makes different pads and cleaning solutions. Picking the right match keeps your floors clean without damage.
Pad Types
- Multi-Surface Pads – Good for everyday dirt and dust on tile, laminate, and vinyl.
- Wood Pads – Softer design to protect sealed hardwood or engineered wood.
- Extra Power Pads – Best for greasy kitchens, muddy entryways, or high-traffic spots.
Cleaning Solutions
- Multi-Surface Solution – Safe for laminate, LVP, vinyl, and ceramic tile.
- Wood Solution – Gentle enough for sealed hardwood.
Floors to Avoid
Do not use the WetJet on unfinished wood, oiled or waxed floors, or unsealed stone. The moisture can soak in and cause permanent damage.
Quick Match Guide
- Laminate, vinyl, or tile → Multi-Surface pad + Multi-Surface solution
- Sealed hardwood → Wood pad + Wood solution
- Greasy kitchen messes → Extra Power pad + Multi-Surface solution
Your First Clean (Step-by-Step)
Once your WetJet is set up, it’s time for the first real test. Follow these steps to get a streak-free finish without wasting pads.
- Prep the Floor: Always start with a quick sweep or vacuum. Grit and pet hair can stick to the pad and scratch your floors if you skip this step.
- Test the Spray: Stand in a corner and pull the trigger 2–3 times. Make sure the sprayer mists evenly. If it sputters, give it a few extra pumps until the spray looks consistent.
- Clean in an S-Pattern: Begin along the edges of the room, then work in overlapping S-shaped lanes. Light, steady sprays keep the pad moist without soaking the floor.
- Spot & Edge Control: For sticky patches or spills, use short trigger bursts and glide right over the spot. Don’t drench the area—less is more.
- Swap Pads When Needed: Once the pad looks gray, feels heavy, or starts dragging, it’s time to replace it. Most kitchens need at least one mid-clean swap.
- Finish Up: When you’re done, peel off the pad straight into the trash. Stand the mop upright so the solution bottle stays sealed.
Streak-Free Tips (That Actually Help)
Getting shiny, clean floors isn’t about flooding the surface. It’s about balance. These tricks keep your WetJet results smooth:
- Spray less, glide more – one or two bursts are enough for each pass. Over-spraying leaves residue.
- Don’t stop on wet spots – keep moving so solution spreads evenly before it dries.
- Swap pads sooner – once they feel heavy or draggy, dirt is just being pushed around. A fresh pad makes the biggest difference.
- Work in sections – clean small areas at a time so you’re not chasing drying streaks.
- Optional quick buff – run a barely damp microfiber over the floor right after mopping if you prefer a matte finish.
Troubleshooting
Even when the Swiffer WetJet is set up right, little issues can pop up. Here’s how to fix them fast:
No Spray Coming Out
- Make sure the solution bottle is clicked in fully.
- Prime the sprayer with 10–15 trigger pulls.
- Check and replace the batteries if the motor sounds weak.
- Wipe the spray nozzles with a damp cloth to clear any buildup.
Streaks or Sticky Floors
- You’re likely over-spraying—use fewer bursts.
- Swap pads sooner; a dirty pad just smears grime.
- For extra shine, do a quick pass with a barely damp microfiber cloth.
Pad Won’t Stay On
- Re-press the pad so it sticks flat to the Velcro.
- If the Velcro strips on the mop are worn, they may need replacing.
Leaks or Drips
- Remove and reinsert the solution bottle until it clicks firmly.
- If the bottle has cracks, replace it with a fresh one.
After-Care & Safety
A little upkeep keeps your Swiffer WetJet working smoothly and makes sure your floors stay safe.
Storage
- Always keep the mop upright so the solution bottle stays sealed.
- Don’t leave it in hot cars or direct sunlight—heat can warp the bottle and cause leaks.
Battery & Mop Care
- If you won’t use it for weeks, remove the batteries to avoid corrosion.
- Wipe the base and nozzles with a damp cloth after each use to prevent buildup.
Product Safety
- Store pads and cleaning solution out of reach of kids and pets.
- Wash your hands after handling dirty pads or swapping bottles.
Compatibility
- Stick with manufacturer solutions to protect your mop and warranty.
- Avoid DIY refills or harsh cleaners—they can clog the sprayer or damage floors.
FAQs
Can I use the WetJet on laminate?
Yes. Just use light sprays and quick passes. Avoid soaking the floor.
Is it safe for sealed hardwood?
Yes, but only with the Wood solution and Wood pads. Never use it on unfinished or waxed wood.
How often should I change pads?
As soon as the pad looks gray, feels heavy, or starts to drag. For most rooms, that means one mid-clean swap.
Can I use plain water in the WetJet?
No. The spray system is designed for Swiffer solutions. Water or DIY mixes can clog the sprayer.
Why does my floor look hazy after cleaning?
That usually means you sprayed too much solution or reused a dirty pad. Use fewer sprays and swap pads sooner.
How long does one bottle of solution last?
On average, one bottle covers 8–10 full-room cleans, depending on room size and how much you spray.
Can I reuse pads?
No. Pads are single-use. Trying to wash and reuse them can damage floors and reduce cleaning power.
What if I have matte or low-sheen floors?
Keep sprays light and do a quick microfiber buff at the end for a natural finish.
Conclusion
The Swiffer WetJet is simple to set up, but the real secret to great results is how you use it. With the right pad and solution, light sprays, and timely pad swaps, you’ll get floors that look fresh without streaks or sticky residue.
If this was your first clean, you now know the basics to keep every room looking its best in just a few minutes.

