Written by Nyla Thompson, Founder of DecorifyIt and Home Improvement Expert with 15+ Years of Hands-On Experience
Engineered hardwood floors are a go-to choice for homeowners who love the warmth of real wood but want better durability. Unlike solid hardwood, engineered wood has a layered construction that holds up better against moisture and temperature changes. But don’t let its toughness fool you—engineered hardwood still requires proper care to keep it looking beautiful for years. In this complete guide, we’ll break down the best way to clean engineered hardwood floors, from daily dusting to deeper maintenance and everything in between. For more details on how engineered wood compares to solid hardwood, check out our detailed side-by-side.
Why Proper Cleaning Matters
Engineered hardwood floors are built to be tougher than traditional hardwood, but they’re not invincible. Underneath their durable surface lies a thin veneer of real wood, topped with a factory-applied finish that protects the surface from everyday wear and tear. Once this finish gets compromised, it becomes much easier for dirt, grime, and moisture to penetrate, which can lead to permanent damage. If you’re curious about how long your floor can hold up with proper care, understanding engineered hardwood flooring thickness will help you determine if your floor is refinishable.
According to the National Wood Flooring Association (NWFA), improper maintenance is one of the most common reasons wood floors age prematurely. Regular and correct cleaning helps retain the floor’s luster, protect the finish, and prevent minor issues—like surface scratches and stains—from turning into bigger problems like warped boards or mold. What’s more, your flooring significantly affects indoor air quality. Dust and allergens settle into cracks and seams, especially if not cleaned consistently. Regular sweeping and mopping help reduce the buildup of irritants—especially important for households with pets or allergy-sensitive members.
Daily Care: Sweep or Vacuum the Smart Way
Daily care might sound excessive, but trust me—it’s a small step that saves you from bigger headaches. Engineered hardwood, like any wood-based floor, is prone to micro-scratches from gritty particles. These tiny abrasions dull the finish over time and can cause noticeable patches of wear in high-traffic zones.
The Right Way to Sweep:
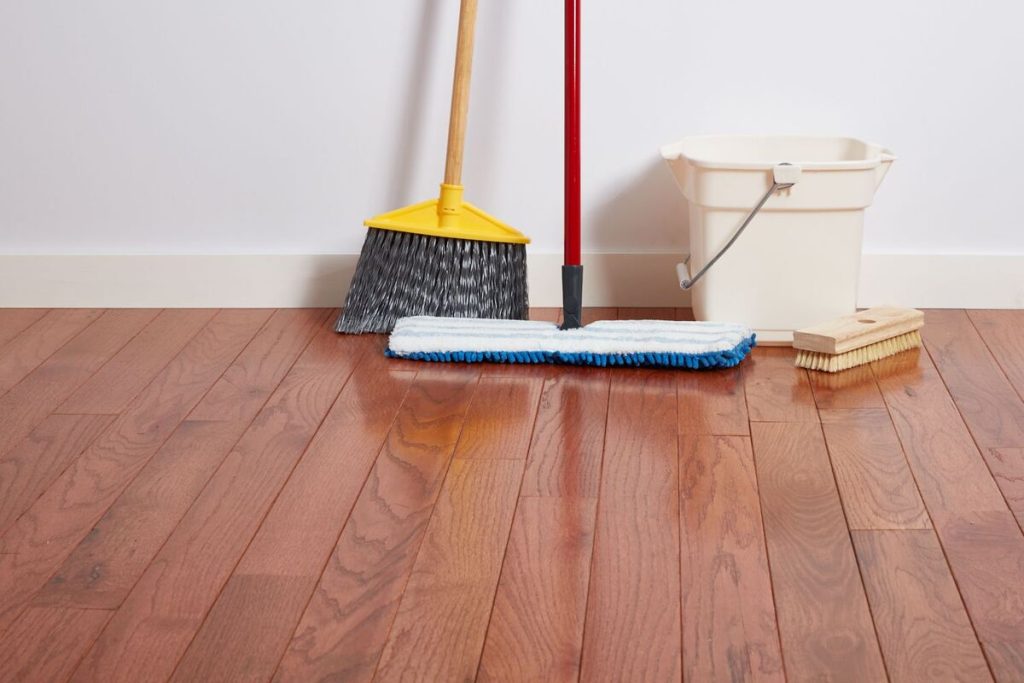
Use a soft-bristled broom—think horsehair or synthetic bristles with feathered tips. Push gently, directing debris toward a dustpan without grinding it into the surface. Avoid stiff outdoor-style brooms or ones with uneven bristle lengths that can leave scratches.
Vacuuming? Mind Your Attachment:
Vacuuming is efficient, but only if done right. Choose a vacuum with a “hard floor” or “bare floor” setting. This disables the spinning beater bar, which is ideal for carpets but too aggressive for wood surfaces. A soft rubber or felt-lined attachment is your best friend for engineered hardwood.
Entryway Mats: Your First Line of Defense
One pro tip that many overlook—place a doormat at every entry point to catch outdoor debris before it makes its way inside. A simple walk-off mat can reduce up to 80% of the dirt tracked in, significantly easing the burden on your daily cleaning routine. For the best material choices, explore our guide on rug rules and entry mat tips.
High Traffic Zones Need Extra Love
Pay attention to areas like the kitchen, hallways, and entrances. These see the most foot traffic and are more susceptible to dulling. A quick sweep each evening in these areas can make a huge difference in keeping your floors pristine without resorting to frequent deep cleans.
Weekly Care: Damp Mopping with Microfiber
Even with daily sweeping or vacuuming, some dirt and grime inevitably build up over time. Weekly damp mopping removes what your broom or vacuum leaves behind—especially the fine particles that settle into the textured grain or seams between planks. But here’s the catch: water is not wood’s best friend. That’s why your mop should only be damp, never dripping wet.
Why Microfiber Mops Work Best
Microfiber mops are engineered for delicate surfaces. Their ultra-fine synthetic fibers grab and hold onto dust, grime, and even bacteria—without relying on excessive water or harsh scrubbing. Compared to traditional sponge mops, they glide more smoothly across the surface, reduce the risk of streaks, and require far less moisture.
Using the Right Cleaner
A pH-neutral cleaner is essential for engineered hardwood. Acidic or alkaline formulas (like vinegar or ammonia-based products) can break down the floor’s finish, causing dullness and long-term damage.
For more insight into why vinegar is not the best option for hardwood floors, read our cleaning myth-buster.
If you prefer a DIY approach, mix a few drops of unscented dish soap with warm water (no more than a teaspoon per half gallon). Always spot test in an inconspicuous area before using any new solution across your entire floor.
Mop With the Grain
It’s not just about looks—mopping in the direction of the wood grain ensures better cleaning. Dirt often settles into the tiny grooves of wood planks. Going with the grain lifts residue more effectively and prevents that patchy or streaky look you sometimes see when cleaning in circular motions.
Aftercare Matters
After mopping, your floor should dry in under two minutes. If it’s taking longer, your mop is too wet. In humid environments, consider turning on a fan to speed up drying and avoid moisture seeping into seams. For deeper info on proper drying and water use, you may want to avoid steam mops on hardwood floors, which can cause irreversible damage.
Spills and Stains: Act Fast, Clean Gently
Accidents happen. Whether it’s a splash of juice in the dining room or muddy paw prints in the hallway, how you respond makes all the difference between a spotless floor and a permanent stain.
Time Is Everything
The sooner you deal with a spill, the less likely it is to soak into the seams or finish. Engineered hardwood resists water better than solid hardwood, but it’s still vulnerable to damage if liquid sits for too long. Always blot—never rub—the spill using a dry microfiber cloth. For oily spills or sticky messes, dampen the cloth slightly. Avoid saturating the floor. Even small pools of water can work their way into the top veneer and cause warping over time. If your floor already shows signs of expansion, here’s how to fill gaps in hardwood floors before the issue worsens.
Spot Cleaning Basics
If a quick blot isn’t enough, mix a few drops of pH-neutral cleaner with warm water on a soft cloth. Gently work from the outside edge of the stain inward to contain the mess. Never use abrasive pads or brushes, which can scratch the protective finish.
Handling Tough Stains the Safe Way
Some stains need more targeted treatment:
- Dye or ink stains: Use a diluted hydrogen peroxide solution on a microfiber cloth (never directly on the floor). Let the cloth sit on the stain for 5–10 minutes, then blot dry.
- Scuffs or rubber marks: These can often be removed with a cloth dipped in a bit of baking soda paste. Curious if it’s safe? Read our guide on using baking soda on wood floors.
Know When to Call a Pro
If the damage is deep—like bubbling, delamination, or discoloration—don’t attempt a DIY fix. And before you even consider sanding, make sure it’s safe. Learn when you can safely sand engineered hardwood floors.
Polishing and Refurbishing for Long-Term Beauty
Even with great daily care, engineered hardwood floors may lose their shine over time. The good news? You can bring it back without a full refinish.
How Often Should You Polish?
You should polish your floors every 2–3 months, especially in high-traffic areas. Choose a polish that’s safe for engineered wood and always clean thoroughly before applying. If your floor looks dull no matter what you do, try these methods to make hardwood floors shine without damaging the finish.
What About Refinishing?
Unlike solid hardwood, engineered floors have a thin wear layer. Some can be sanded and refinished 1–3 times, depending on their thickness. Not sure how? Check our guide on engineered flooring thickness to assess your options.
Alternative: Screening and Recoating
If sanding isn’t an option, consider a screen-and-recoat—a light buff followed by a new topcoat. It’s less invasive and ideal for dealing with surface scratches or minor dullness. For a non-invasive approach, explore ways to seal hardwood floors without sanding.
What to Avoid (and Why It Matters)
Even though engineered hardwood is built to last, using the wrong products or techniques can ruin it quickly. Here’s what to steer clear of.
1. Never Use Steam Cleaners
Steam mops might feel effective, but they can cause layers to warp, swell, or separate. Learn more in our breakdown of why a steam mop isn’t safe for hardwood floors.
2. Avoid Harsh Chemicals
Products like bleach and ammonia strip the protective coating and may discolor your floors. Before you reach for the bottle, check the long-term damage caused by using bleach on hardwood or Pine-Sol.
3. Say No to Abrasive Tools
Steel wool, hard brushes, and scrubbing pads can scratch even a well-finished floor. Use microfiber or soft cleaning pads exclusively.
4. Avoid Standing Water
Engineered wood handles moisture better than solid wood—but it’s not waterproof. Puddles from mopping or pet bowls should be dried immediately.
5. Be Cautious with Heavy Furniture
Dragging chairs or tables can gouge the surface. Use felt pads and rugs in heavy-use areas. And if your floor is already scratched, here’s how to buff out scratches safely without making things worse.
Smart Preventive Habits That Make a Difference
The best way to protect your engineered hardwood floor is to stop damage before it starts. These everyday habits make a big difference in long-term care.
1. Use Entryway Mats Strategically
Walk-off mats placed inside and outside each door can trap over 70% of tracked-in dirt. That means fewer scratches and less debris grinding into your floors. For more tips, check our complete guide on rug rules and floor-safe materials.
2. Furniture Pads = Floor Protection
Add felt pads under sofas, dining chairs, and any furniture that moves. It’s a simple upgrade that protects your floors from dents and scrapes. If you’re upgrading home furniture, start with our furniture selection guide to match aesthetics with practicality.
3. Rugs in High-Traffic Zones
Strategic rug placement in hallways, kitchens, and kids’ play areas helps minimize scuffs. Low-pile rugs with soft backings are best. Explore cozy styling inspiration with our cabin bedroom ideas that combine comfort with floor protection.
4. Trim Pet Nails Regularly
Pets don’t mean to damage floors—but they will if their nails aren’t trimmed. Keep a regular grooming routine and consider placing small rugs in your pet’s favorite spots.
5. Control Your Indoor Climate
Maintain indoor humidity between 30–50% year-round. Dry air can shrink boards, while excess moisture can cause swelling. A humidifier or dehumidifier can help. For rooms prone to fluctuations, such as unfinished spaces, you may want to review how to care for unfinished wood flooring.
What If Your Floor’s Already Dull or Scratched?
Even with the best care, floors eventually show signs of wear. Here’s how to address common issues without replacing planks.
1. Fixing Light Surface Scratches
Use a matching floor repair marker or crayon to fill minor scratches. Always wipe away excess for a smooth blend. If the problem runs deeper, learn how to fix hardwood scratches without damaging the protective finish.
2. Dealing with Widespread Dullness
If your entire floor has lost its glow, try a screen-and-recoat. It refreshes the top layer without sanding. You can also check our tips on restoring dull or aging hardwood floors safely at home.
3. When to Call a Pro
Deep gouges, water damage, or wear-through of the veneer layer should be handled professionally. If you’re unsure what kind of wood you’re working with, or if it’s unfinished, see our step-by-step on cleaning unfinished hardwood floors correctly.

